A shingle roof should fade into the background of daily life. When it does its job well, you do not think about it through spring storms, summer heat, and January freezes. When roof shingle installation goes wrong, though, the signs creep in early and compound over time: a damp patch in the attic after a nor’easter, a shingle tab lifted by the afternoon breeze, a row that looks just a hair crooked from the street. Small mistakes at installation multiply under sun, wind, and water. Knowing what to look for and how to address it can save thousands in shingle roof repair or an avoidable roof shingle replacement.
This guide draws from years on ladders and scaffolds, crawling through attics with a flashlight and a moisture meter. I will show you the most common indicators of poor workmanship on shingle roofing, why they matter, and practical fixes based on the severity of the issue. Use it to evaluate your own roof, vet a shingle roofing contractor, or plan an appropriate repair.
Why early signs matter more than they seem
Shingles are a system, not a skin. They rely on the underlayment, flashings, deck, ventilation, and fasteners to work together. Poor roof shingle installation in one area stresses the others. A nail driven too high leaves a tab unsecured, which invites wind lift. Wind lift breaks the seal strip, which drives water under the course, which looks for the path of least resistance and often finds the fastener hole. Insulation gets damp, wood swells, and mold spores get the humidity they need. Six months later, you are not fixing a single shingle, you are replacing a rotten roof deck panel and repainting a bedroom ceiling.
Catching problems early rarely requires specialized gear. Good eyes, a steady ladder, and, if needed, a licensed roofer’s inspection can separate cosmetic quirks from defects that shorten a roof’s life.
Visual cues from the ground
Most homeowners first notice something off from the sidewalk or driveway. A roof that looks “busy” or uneven often is. Trained eyes pick up on patterning and geometry more than individual flaws.
Shingle courses should run parallel to the eaves and ridge. When the starter course is misaligned, the entire field of shingles can drift. You will see rows that appear to climb or drop, especially near hips and valleys. Sometimes the underlying roof deck is out of square, but careful installers adjust course layout to disguise small discrepancies. If the rows change exposure across the plane of the roof, that is an installation problem, not a framing quirk.
Another tell is inconsistent color shading. Asphalt shingles have manufacturing blends, so some variation is normal. The bad sign is blocky, checkerboard patterns where bundles were not mixed during installation. That is cosmetic, but it signals haste, and haste often shows up elsewhere.
Then there is granule distribution. New shingle roofing sheds some granules in the first few months. Heavy loss in streaks or patches points to overdriven nails or a heat-heavy attic baking the asphalt. Look in gutters and at downspout outlets. If you see shovelfuls of granules after moderate rains, something is off.
Finally, look for lifted tabs, exposed nails, or shingle corners that sit proud instead of lying flat. Even on a calm day, you should not see movement. Sunlight glinting off nail heads is a red flag. Nails belong under the shingle above, not exposed to weather.
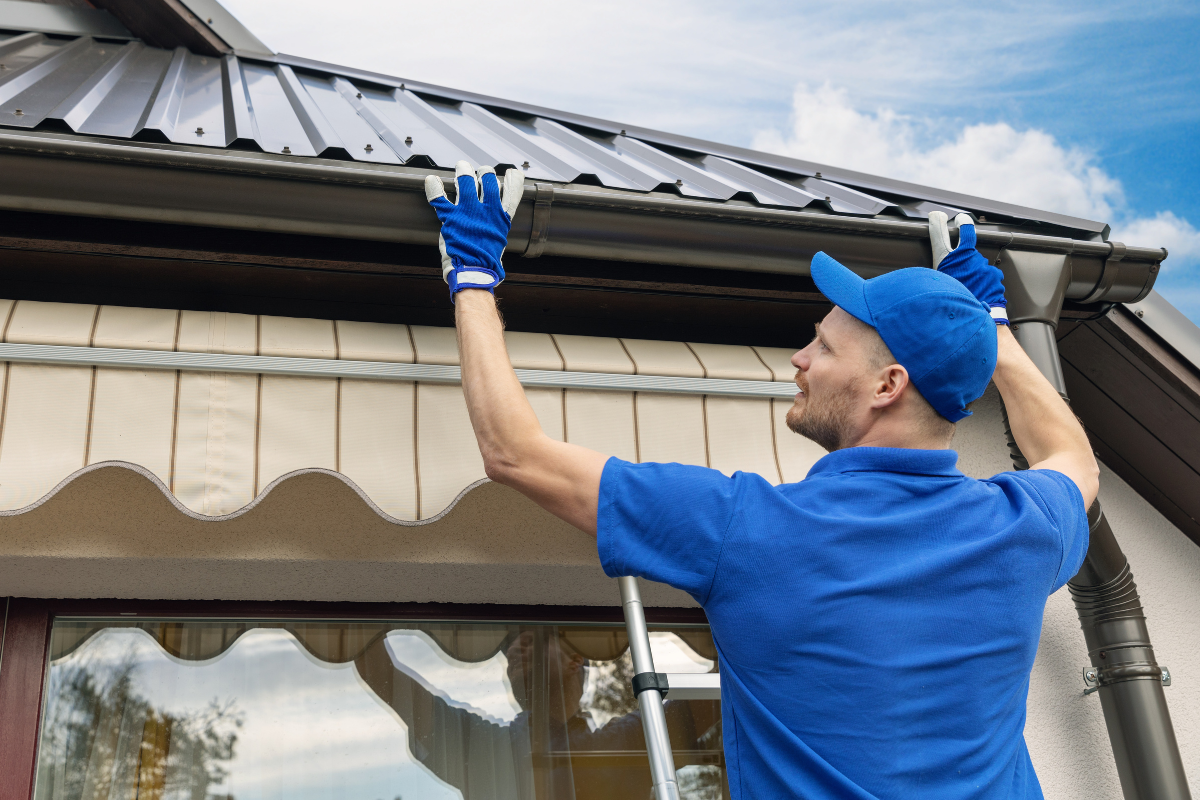
Close-up signs once you are safely on a ladder
Climb only if you are comfortable and have someone footing the ladder. You do not need to step onto the roof to learn a lot. From the ladder, examine these details along the eaves and near penetrations like vents or skylights.
Nail placement is a giveaway. On three-tab shingles, nails must be driven into the nail line, a band that catches both the shingle and the shingle below. Architectural shingles have a defined nailing zone as well. Nails too high do not secure the lower shingle. Nails too low can be exposed or cut through the shingle below. Nails should sit flush, not cut into the mat. A sunken nail breaks the fiberglass scrim, weakens the shingle, and can invite a tear under wind load.
Starter shingles should bond to the first course. If the installer used cut three-tabs for starters but flipped them incorrectly, the seal strip may be missing along the eaves. That allows wind to get under the first course, a classic source of edge lift. A quick check with a plastic putty knife under a tab along the eave can reveal whether the seal has set. In mild weather, a properly sealed tab resists gentle lifting. If entire runs lift with almost no resistance in warm sun, the seal strip never mated, often due to dust, cold installation, or poor starter layout.
Flashing around chimneys, walls, and skylights deserves close attention. Step flashing should be individual pieces laced with each shingle course, not a continuous L strip capped with hope. Counterflashing should overlap step flashing and be embedded or reglet-cut into masonry. Mastic smeared over a flashing failure is a temporary bandage, not a repair. You can spot this from the ladder: look for tar globs where metal should be.
In valleys, the shingle cut should be clean and consistent. An open metal valley should show a centered channel of exposed metal, with fasteners kept at least several inches away from the valley centerline. A closed-cut valley should have the top layer trimmed back to a neat line, not ragged hand tears. Nails driven into the valley trough are a leak waiting for a heavy rain.
Vent and pipe boot details matter. A proper boot sits on top of the lower courses and under the upper courses, with no exposed fasteners through the top flange. If you can see nail heads through the upper flange or the boot is cocked at an angle, expect early failure.
Water tells the truth: attic and ceiling clues
Stains rarely lie. After a storm, take a flashlight to the attic. Pay attention to the underside of the roof deck around valleys, penetrations, and where planes meet at hips and ridges. Darkened sheathing, rusty nail tips, and damp insulation indicate infiltration. Even a faint musty smell suggests recurring moisture. In winter, inadequate ventilation will frost the nail tips and then drip when temperatures rise, which looks like a roof leak but points to airflow issues rather than shingle defects. Either way, it is related to installation, because ventilation and baffle placement should be part of a complete roof shingle installation.
On finished ceilings, look for yellow-brown rings, hairline cracks, or paint that bubbles near corners. Track the location to a point on the roof, then check what details live above. A ring by an exterior wall often tracks back to failed step flashing. A spot near the center of a room can trace to a vent stack or a ridge detail.
Common installation mistakes that shorten shingle life
Patterns repeat on job after job. These are the mistakes I see most often and the risks they pose.
Improper nailing. Misplaced, underdriven, overdriven, or angled nails compromise wind resistance and leak protection. In high-wind zones, a single high-nailed course can unzip in one gust. Manufacturers specify nail count per shingle, usually four in moderate zones and six in high-wind areas. Falling short voids warranties and reduces pull-through resistance.
Skipped or misapplied underlayment. A roof is not just shingles. Ice and water shield at eaves and valleys, and felt or synthetic underlayment across the field, manage condensation and wind-driven rain. Where snow loads or ice dams are possible, membranes must extend far enough from the eaves, typically at least to a point 24 inches inside the warm wall. Skimping here shows up as leaks at the perimeter after freeze-thaw cycles.
Bad starter course. No starter or a reversed starter strip means the first row cannot seal and is not waterproof at the joint. Edge lift and perimeter leaks follow.
Sloppy flashing. Reusing old flashing, relying on sealant instead of proper laps, or skipping counterflashing around masonry puts all the burden on the shingles. Water finds weak seams, and capillarity does the rest.
Unvented or under-vented assemblies. Shingle ratings assume a ventilated deck. Trapped heat cooks asphalt, curls tabs, and accelerates granule loss. Trapped moisture leads to mold and decking rot. Balance intake at soffits with exhaust at ridge or roof vents. Air has to travel from low to high, not in and out at the same elevation.
Incorrect exposure and coursing. Each shingle model has a designed reveal. Overexposing saves material but reduces coverage and makes leak paths generous. Underexposing wastes material and can telegraph irregularities. Consistent, accurate exposure helps the seal strips align and bond.
Installing in the wrong conditions. Cold weather installations can be done, but they require hand-sealing in many cases and clean, dry surfaces. Hot days over soft shingles demand gentle handling and careful nailing to avoid blow-through. Windy days invite dust contamination of the seal strip, which prevents bonding.
Distinguishing cosmetic issues from functional defects
Not every oddity deserves a repair crew. It helps to sort issues by urgency, especially when budgeting.
Shading patterns and bundle blotches, while unsightly, are rarely functional concerns. If they bother you and the roof is new, raise it with the installer early. Many manufacturers consider color variation cosmetic and not a warranty issue, but a conscientious shingle roofing contractor will document it and advocate on your behalf if it looks like a production batch problem.
Minor scuffs, small surface blisters, or isolated lifted corners after a storm can be spot-treated. These are watch-and-verify items. Mark the area, check again after a month, and see if the seal rebounds in warm weather.
Exposed nails, loose flashing, and water entry are functional defects. Do not wait. The right roof shingle repair today stops a chain reaction tomorrow. If you spot wet decking or active drips, move quickly.
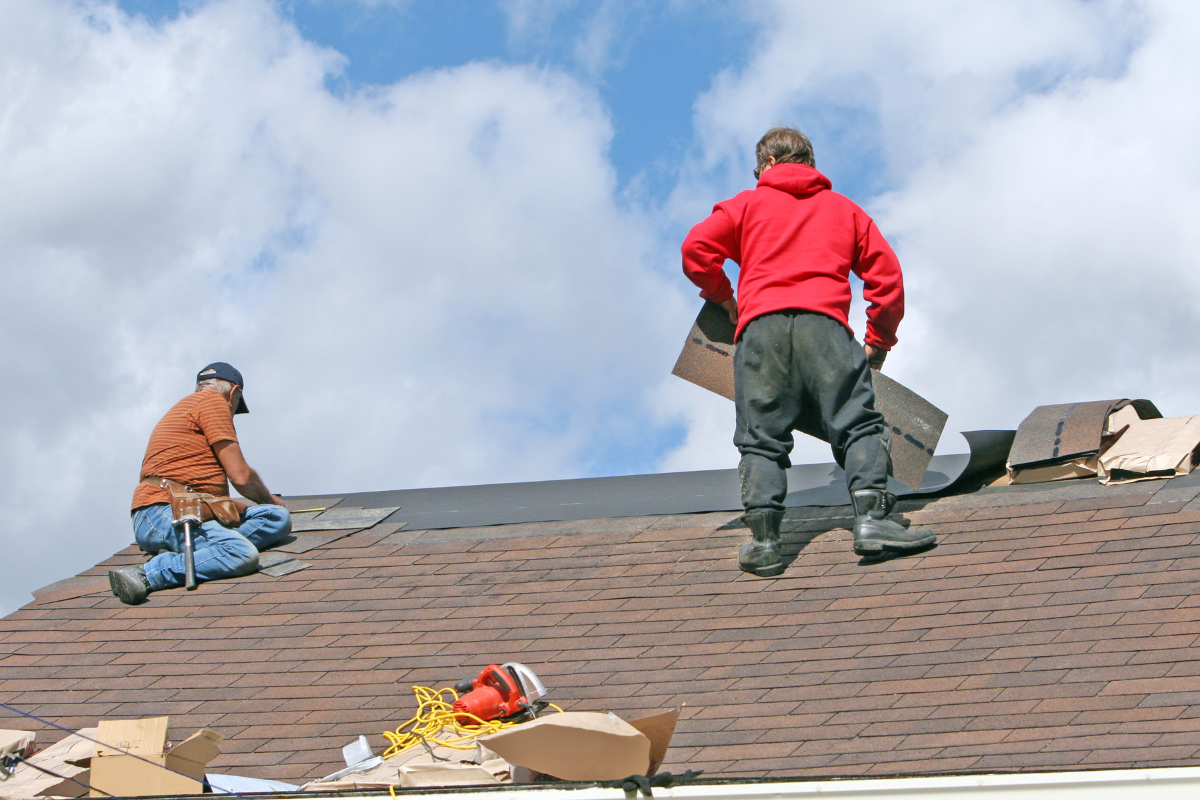
Practical fixes: from DIY touch-ups to professional repair
Some problems are approachable for a handy homeowner with proper safety measures. Others require equipment, technique, and judgment that are worth paying for. Here is a concise decision guide that keeps both safety and durability in mind.
- Safety and simple access: If you can reach the area from a ladder without stepping onto the roof and feel steady, you can address minor seal and nail issues. Anything on a steep slope, near a valley, or above two stories is better left to a pro for safety alone. Materials and detail complexity: Replacing a lifted tab or dabbing sealant under a starter edge is straightforward. Reworking step flashing, re-laying a valley, or rebuilding a skylight curb needs a roofer. Signs of systemic flaws: Multiple high-nailed rows across a slope, widespread overexposed courses, or chronic attic moisture suggest systemic problems. Spot fixes will not hold. Consider a planned roof shingle replacement or at least a scoped re-lay of affected sections.
For small DIY repairs, use manufacturer-approved roofing cement sparingly. Lift the shingle gently with a putty knife, apply a small dab above the seal strip, and press. Do not glob sealant into a valley or over flashing. For exposed nails, remove and replace with a properly placed nail, then cover the removed hole with cement and a granule sprinkle to shield it from UV.
For professional shingle roof repair, ask your contractor to photograph the issue and the underlying layers. When I open up a valley that’s been leaking, I take pictures of the cut line, nail placement, membrane coverage, and the deck condition. Good documentation builds trust, and it gives you leverage with any manufacturer claim.
How to troubleshoot by symptom
If you’re not sure where to start, match what you see to likely causes and targeted actions.
Ceiling stain near an exterior wall. Likely suspect is step flashing at a roof-to-wall intersection. This can be mis-lapped, pinned by siding nails, or missing counterflashing. A proper repair removes the siding as needed, re-laces step flashing with each shingle course, and installs counterflashing under or into the cladding correctly.
Leak during wind-driven rain, not during straight-down showers. Look at ridge vents, roof vents, and shingle seals. Wind can push water under unsealed tabs and into poorly baffled vents. Hand-seal shingles where needed and replace any vent with poor internal baffles.
Gutter full of granules on a two-year-old roof. Heavy granule loss this early points to ventilation issues or aggressive pressure washing, not normal aging. Check attic temperatures on a sunny afternoon. If you can barely breathe up there, you need more intake or exhaust, possibly both. An infrared thermometer or a cheap temperature probe can quantify the problem. Reducing attic temps by 10 to 20 degrees can slow granule loss.
Shingle corners lifted on an east-facing slope, but fine elsewhere. Morning shade can delay seal activation if installation occurred in cool weather. Gentle warming and hand-sealing can solve it. If the roof is older and the lift persists, check for under-driven nails holding the shingle off the deck.
Ridge line visible as a wavy snake. That can be uneven decking, but it can also be high nails or debris under the ridge cap. In re-roofs over old layers, telegraphing is common. On a single-layer roof, pop a cap and investigate. A few adjustments can straighten the line.
The role of ventilation and attic insulation
Roofing manufacturers set performance and warranty assumptions on the idea of a balanced attic system. Balanced means your intake at soffits roughly matches your exhaust at ridge or roof vents. Air should move across the underside of the deck, clearing moisture and excess heat. Too little intake chokes the system, even with a long ridge vent. Too little exhaust traps hot, moist air.
A poorly vented attic accelerates asphalt aging. On summer days, attic temperatures can reach 140 to 160 degrees without proper airflow. That softens the asphalt, weakens the bond of the seal strip, and encourages granule loss. In winter, humid indoor air that leaks into the attic condenses on cold surfaces. You will see frost on nail tips on a January morning, then dripping https://gunneryglv247.theglensecret.com/installing-starter-strips-a-key-step-in-shingle-roofing as the sun warms the roof. Homeowners often mistake this for roof failure, when the fix is more intake, baffles to keep insulation from blocking soffits, and adequate exhaust.
When planning shingle roof repair, consider ventilation improvements part of the scope. If your eaves are closed or insulation has crept over the soffit vents, add proper baffles and clear pathways. If you lack a ridge vent and have box vents scattered randomly, a contractor can re-balance the system during a roof shingle replacement or a significant repair.
Flashings: the small metal parts that make or break the system
I have seen immaculate shingle laying undermined by one corner of bad flashing. Water concentrates where planes meet. Flashing handles that concentration. Two problems recur: trying to reuse old flashing, and treating sealant as a structural material. Flashing should be metal, mechanically fastened and lapped to shed water, not ask it to leap a gap. Sealant augments a joint; it should not be the joint.
Chimneys need both step flashing and counterflashing. The step flashing should be interleaved with shingles, each piece extending up the chimney and out onto the roof deck. Counterflashing should be cut into a mortar joint or built into the chimney, overlapping the step flashing. A surface smear of tar where counterflashing belongs is a short-term patch.
Skylights need curbs or factory-integrated flashing kits that match the roof pitch. Field-fabricated curbs should have corner soldering that actually holds, not just a bent tab with sealant. Drip channels must be clear. Even a perfectly set skylight will leak if upstream ice dams trap water. Ice and water shield should wrap the curb and extend beyond it.
Repair or replace: weighing the inflection point
Sometimes the candid answer is that a roof with widespread installation defects is not worth piecemeal repair. The tipping point usually arrives with three or more of the following: pervasive high nailing, poor underlayment coverage at eaves and valleys, recurrent leaks across different roof planes, and shingles approaching the midpoint of their rated life. At that stage, a roof shingle replacement yields better long-term value than successive shingle roof repair calls.
The financial calculus includes risk. If your home has complex intersections, multiple penetrations, or low-slope sections where leaks exact higher interior costs, your tolerance for marginal installation quality should be low. An orderly replacement during good weather, with a vetted shingle roofing contractor, gives you a coherent system and a warranty that means something. Patching your way through another winter can be a reasonable bridge when the roof is young and defects are localized, but it is a gamble when the underlying errors are systemic.
Choosing and managing a shingle roofing contractor
Quality varies widely. Good contractors are busy but not chaotic, precise without being rigid. They should welcome questions, not dodge them. When you interview a roofer, ask to see a recent job and one that is five to ten years old. A roof that still looks tight at year eight speaks louder than a glossy brochure.
Make your expectations concrete. Specify the shingle model and color, underlayment type, ice and water shield extents, nail count and fastener type, and flashing approach for each condition on your home. The more specific the scope, the fewer assumptions. Discuss ventilation: intake, exhaust, and baffle installation. Ask how they handle cold-weather installation if the schedule pushes into late fall. A pro will talk about hand-sealing requirements, staging, and weather windows.
Request photos during the job. A conscientious crew will document the deck condition before felt, the membrane coverage in valleys and eaves, the step flashing sequence, and final details. This is invaluable if a future issue arises.
Finally, coordinate with other trades. If you are replacing siding or adding attic insulation, sequence the work. Step flashing wants to be behind siding, not trapped by it. Soffit venting improvements need baffles before dense-pack insulation closes the cavity.
What manufacturers will and will not cover
Many homeowners expect a shingle warranty to solve any problem. Manufacturer warranties generally cover defects in the shingle itself, not installation errors. If a roof fails because nails were high or flashing was reused, the warranty will not help. Some brands offer enhanced warranties when a certified shingle roofing contractor installs the entire system using branded components. Even then, documentation matters, and ventilation requirements must be met. Keep all invoices, product wrappers, and a photo record. Think of the warranty as an insurance policy that only pays if you meet conditions, not a blanket guarantee.
Seasonal maintenance that protects your investment
A well-installed shingle roof still benefits from attention. Clear gutters in spring and fall so water has a quick path off the roof. Trim tree branches that rub shingles or shade them heavily. After big storms, walk the perimeter and look for displaced tabs or debris lodged in valleys. A pair of binoculars is handy here. In winter climates, manage attic humidity and insulation to reduce ice dams. Ice dams themselves are not evidence of bad shingles, but they expose weaknesses. If you see dams forming, consider adding heat cables as a short-term measure and addressing ventilation and insulation as the proper fix.
For homes near the coast or in high UV zones, schedule a professional check every two to three years. A roofer can re-seat loose ridge caps, replace a tired boot, or catch a failing seal before it escalates. These small touches extend the life of the system significantly.
A brief case example: three small misses, one big leak
A client called about a stain that appeared after every wind-driven rain from the east. The roof was three years old, architectural shingles from a reputable brand. From the ground, the roof looked neat. In the attic, the sheathing near a dormer wall showed water tracks. On the roof, three issues emerged. The starter strip at the eave below the dormer was reversed, so the seal strip did not engage. The step flashing at the dormer wall was installed as a continuous pan under the siding, not stepped. And nails in the closed-cut valley were within an inch of the centerline.
Each alone might have survived. Together, they failed during an east wind that drove water up the dormer wall, under the first course, and into the valley. The fix involved re-lacing step flashing properly, replacing the first three courses with a correct starter, and reworking six feet of the valley with new membrane and fastener placement outside the no-nail zone. Material cost was modest, labor was a day, and the leak never returned. The lesson is that poor roof shingle installation often clusters. When you uncover one miss, look for its siblings.
When to escalate to a full diagnostic
If you inherit a roof with scattered symptoms and the history is murky, it can pay to commission a full diagnostic. A thorough assessment includes moisture readings at suspect areas, thermal imaging on a cool morning to spot damp insulation, spot lifts to verify underlayment and nail patterns, and attic airflow analysis. On complex roofs with multiple planes and penetrations, this level of study informs a targeted scope. For example, you might re-lay two slopes and re-flash all penetrations now, then plan the remaining slopes in five years. That is smarter than replacing two shingles every storm cycle.
Final thoughts
Shingle roofing rewards craft and punishes shortcuts. Most “mysterious” leaks are not mysterious; they trace back to a handful of predictable mistakes. If you know the signs of poor roof shingle installation, you can act early. If you weigh repairs intelligently and partner with a competent shingle roofing contractor, you can restore the roof to the reliable, quiet component it should be.
When you look up at your roof next time, do not just check for missing shingles. Let your eye take in the straightness of courses, the neatness of valleys, the cleanliness of flashing lines, and the subtle clues that suggest a system working as designed. That quick scan, done a few times a year, is the simplest insurance you can buy against the outsized costs of water where it does not belong.
Express Roofing Supply
Address: 1790 SW 30th Ave, Hallandale Beach, FL 33009
Phone: (954) 477-7703
Website: https://www.expressroofsupply.com/
FAQ About Roof Repair
How much should it cost to repair a roof? Minor repairs (sealant, a few shingles, small flashing fixes) typically run $150–$600, moderate repairs (leaks, larger flashing/vent issues) are often $400–$1,500, and extensive repairs (structural or widespread damage) can be $1,500–$5,000+; actual pricing varies by material, roof pitch, access, and local labor rates.
How much does it roughly cost to fix a roof? As a rough rule of thumb, plan around $3–$12 per square foot for common repairs, with asphalt generally at the lower end and tile/metal at the higher end; expect trip minimums and emergency fees to increase the total.
What is the most common roof repair? Replacing damaged or missing shingles/tiles and fixing flashing around chimneys, skylights, and vents are the most common repairs, since these areas are frequent sources of leaks.
Can you repair a roof without replacing it? Yes—if the damage is localized and the underlying decking and structure are sound, targeted repairs (patching, flashing replacement, shingle swaps) can restore performance without a full replacement.
Can you repair just a section of a roof? Yes—partial repairs or “sectional” reroofs are common for isolated damage; ensure materials match (age, color, profile) and that transitions are properly flashed to avoid future leaks.
Can a handyman do roof repairs? A handyman can handle small, simple fixes, but for leak diagnosis, flashing work, structural issues, or warranty-covered roofs, it’s safer to hire a licensed roofing contractor for proper materials, safety, and documentation.
Does homeowners insurance cover roof repair? Usually only for sudden, accidental damage (e.g., wind, hail, falling tree limbs) and not for wear-and-tear or neglect; coverage specifics, deductibles, and documentation requirements vary by policy—check your insurer before starting work.
What is the best time of year for roof repair? Dry, mild weather is ideal—often late spring through early fall; in warmer climates, schedule repairs for the dry season and avoid periods with heavy rain, high winds, or freezing temperatures for best adhesion and safety.